Beautiful Card Designs Made Easy

Showing posts with label Want2Scrap. Show all posts

March 21, 2017

Tuesday Tutorial - Heirloom Rectangle

Hi Everybody,

Todays card features a die that has been around now for quite some time and you may have this is your personal "stash"   If you do it maybe time to get it out again and try this really easy card. 
 The dies do all the work and the flowers are the crowning glory in soft shades of lilac and white
The card has been created with just the one set of dies
Spellbinders Used:
Other Supplies:
With die #4 and white card cut two layers for the base  and a layer in lilac
With dies #3 and 4 together cut another layer in white for the patterned piece
Create the base with the two white pieces by scoring along one a little way down and gluing them together along the small panel
Add foam to the back of the other two and layer the lilac and patterned pieces together
Wrap ribbon around these layers before adding to the base card
Cut die #2 in lilac and emboss this piece for more texture. Add foam pads to the back and arrange over the top of the ribbon
Stamp the sentiment of your choice and cut out with the smallest die
Cut two more in white and one in lilac
Glue the white ones together keeping the sentiment one for the top. This will give depth to the panel
Cut the lilac one in half and arrange around the sentiment panels to leave a small border.
Attach foam to the back of these
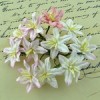
Select the flowers you would like.
From left to right I have used:
Gypsophila, Chrysanthemum, Cosmos Daisies, Tulips, Roses
Arrange the flowers in a pleasing display on your card and dot with glue then sprinkle with glitter.
Add the bow and small pearls around the flowers

More tomorrow ...

Hugs xx

March 20, 2017

Die Cutting Essentials Special Vol 4

Hi Everybody,

This Thursday the 23rd  March a new issue of 
Die Cutting Essentials Special Volume 4 
will be on sale in your local craft shops and selected supermarkets and  I am so pleased to say that some of  my cards will be one of the features in the pages.  

And I have a video to give you a sneaky peak of  DCE Special Vol 4  and show you some more ideas that I have designed

There is also a beautiful paper pack that you can use with some deep and dramatic colours in the mix.

The video will show you exactly what is in the pack and I am sure that you will have fun playing with it.

My flowers are from Wild Orchid Crafts and the pearl flourish is from Wnt2Scrap

The ribbon on the hearts card is also in the pack and is a vibrant shade of pink

If you wanted this special edition you can get it HERE

More tomorrow ...

Hugs xx


March 13, 2017

Pretty Butterflies

Hi Everybody,

This is one of the cards that I featured in the

It was using the die that came free with Simply Cards and Papercrafts 160 a few weeks ago

There are lots of ways to use this pretty free gift and in the video I tried to give you some options.

I used coloured inks to create the background using the stamps and then I stamped extra butterflies onto a separate piece of card and fussy cut them out

They have been added to the card just gluing along the body line and raising the wings slightly

The pearl flourish from Want2Scrap has been used to make the butterfly trails from each one

I matted the panel onto some black card and then layered it to an embossed panel before adding to the base card

More tomorrow ...

Hugs xx

March 03, 2017

Friday Freebie 008 - Pink Floral

Hi Everybody,

Todays card on offer is the one that I made sometime ago and was offered at the start of the year and not claimed by the winner..

It is in a really pretty pink with flowers to match tucked around the sentiment, and all the petals have been sparkled with glitter.

I have used Tulips, Roses, Gypsophila, Geums and Cosmos Daisies and all have been added with a hot glue gun so that I am certain they won't fall off.

Pink pearls are dotted around the display and on the pink ribbon there is a large dazzler

So if you would like to have this card then all you need to do is leave me a comment at the end of the post.

From those comments one name will be chosen at random and notified in tomorrows blog post. It doesn't matter where you live or even if you have won one before and you don't need to have your won blog to enter.

But once the name is announced then you will only have 72 hours to claim it by sending me your postal address by email ... so good luck !! And please check if it is your name and claim this pretty card.

More tomorrow ...

Hugs xx

February 28, 2017

Tuesday Tutorial - Sapphire Dies

Hi Everybody,

It's time to get out those small dies again for a quick and easy card. 
I have used the Basic A set before and so here is another way to put them to good use.  
Having cards that are easy to make is always handy for those times when you need a quick card
Spellbinders Supplies:
Other Supplies:
Fold an A4 piece of card in half along the short sides and then cut in half to produce two portrait card with the fold at the top.
With some pretty paper create a mat that is slightly smaller and leaves a thin border around the edge.
Create another white mat again leaving a small border and emboss this piece in the folder
Cut the label die  and HI in gold.
Cut the oval  and butterfly in patterned paper 
Cut the flowers in two shades of pink and as many as you would like to add
Thread the label with the white ribbon and attach to the embossed layer
Add these to the patterned layer and attach all to the card base
Place the floral oval to the top of the label and arrange the flowers around the edge
Dot the flowers with a pearl in the centre
Glue the butterfly along the body line and attach to the card then add pearls along the body and add a butterfly trail with a pearl flourish
Add small thin foam pads to the back of the Hi and add in the lower corner of the card
Vary the colour scheme for the next card and use any embossing folder that you have in your craft goodies.

More tomorrow ...

Hugs xx


February 21, 2017

Tuesday Tutorial - Blooming Collection

Hi Everybody,

For todays card I am once again mixing and matching dies and one is Medallions Three which I have used many times in the past.  
The other is called Blooming Collection and it creates a really pretty open fretwork type of frame.  The bow is created with the DecoFun Bow maker and this is the first ribbon I have tied with it
Spellbinders Supplies:
Other Supplies:

With die # 8 from the matting basics cut two pieces in white and Create A Hinged Card
Create smaller layers leaving just a small border around the edge in blue and white 
Emboss the smallest white layer in any folder that you have
Add the blue and white layers together
With both parts of Medallions Three cut a layer in blue
Add small foam pads in strategic areas that cannot be seen from the front
Create a smaller white mat that has been embossed to sit under this die cut
Add the die cut to the top of this panel
With Silver Mirror Card cut one layer and again add small foam pads so that they cannot be seen from the front
Add these layers together and wrap ribbon around them threading it under the silver frame
Add to the base card 
Add small foam pads around the die cut circular frame of the die and stamp and heat emboss your sentiment onto the solid part 
Add in a double tied bow and place one single rose in the centre
Dress with more flowers in the top right corner. 
I have used Roses in two sizes, three rosebuds, Gypsophilla and one cherry blossom for my display
All have been dabbed with glue and glittered to make them sparkle

More tomorrow ...

Hugs xx


February 20, 2017

Another Freebie

Hi Everybody,

Today I have another magazine freebie to tell you about and this one is

This will be on sale in selected supermarkets and craft shops on Thursday 23 rd February.

You can also get it from WHSmiths or direct from More Mags 


 Using that link you can take out  a magazine subscription if you prefer and that way you will always be sure to get your favorite magazine

The gift is called Darling Doilies and it is in three sections to make some lovely adornments for your designs.  

The video is available on YouTube and is

You can keep it simple if you wish and this is just a one layer card so will fit into an ordinary envelope for posting.

Or you can dress it up with pretty flowers and make a box to put it in

Here I have used Roses in two sizes 20mm and 15mm ... plus Tuscany Rosebuds and tulips.

All have been sparkled with glitter and the  gingham ribbon has been glued in place under the bouquet


The flowers and the pearls centre on the bow are all from Wild Orchid Crafts

The pearl flourish is from Want2Scrap

More tomorrow ...

Hugs xx

January 31, 2017

Tuesday Tutorial - Oval Floral

Hi Everybody,

Another quick and easy card to make today and this uses the beautiful oval die from Spellbinders. I have chosen the lovely combination of lilac and white for my as I always think this is a fresh colour scheme that can be used for so many occasions.
Spellbinders Supplies:
Other Supplies:
With white card cut two pieces from die #7 Matting Basics A and Create a Hinged Card
Hand cut a slightly smaller layer in lilac card to leave a narrow border around the edge
Hand cut another white layer that is again slightly smaller than the lilac and emboss this piece to add texture to the layer
(Please remember that die =1 is always the smallest)
With Oval Floral dies #2 & 3 cut three frames and glue them all together for extra strength
Cut the sentiment twice in white and once in Silver glitter card and glue together


Add the embossed layer to the lilac card and wrap with lace and ribbon before adding to the base card
Add the frame in the position you want it and lay the sentiment across the frame.
I have used tiny pieces of foam tape on the outer letters to make it lie evenly across the frame.
Arrange the flowers as you like them and add in a little bow 
Dot the flowers with glue and sprinkle on the glitter.
Allow to dry and then the glitter will lie flat on the petals.
Arrange lilac pearls into the Ovals centre in a random pattern

A card for any occasion ... just alter the sentiment

More tomorrow ...

Hugs xx