Beautiful Card Designs Made Easy

April 05, 2016

Tuesday Tutorial - Damask Accents & Motifs

Hi Everybody,

When I first started to collect Spellbinders,  the Accents and Motifs dies where very popular and I bought most of the sets that where available.  Now most of them have been retired from SB website but I still have them in my collection.

And so I need to use them and I am sure that many of you will also have these beautiful dies in your own collections.  Maybe they languish at the back of your cupboard unused and un loved because you have forgotten about them. 
Spellbinders Supplies:
  • S5-080 Damask Accents
  • S5-081 Damask Motifs
  • SEL-001 Maze   Embossing Folder
Other Supplies:
Instructions:
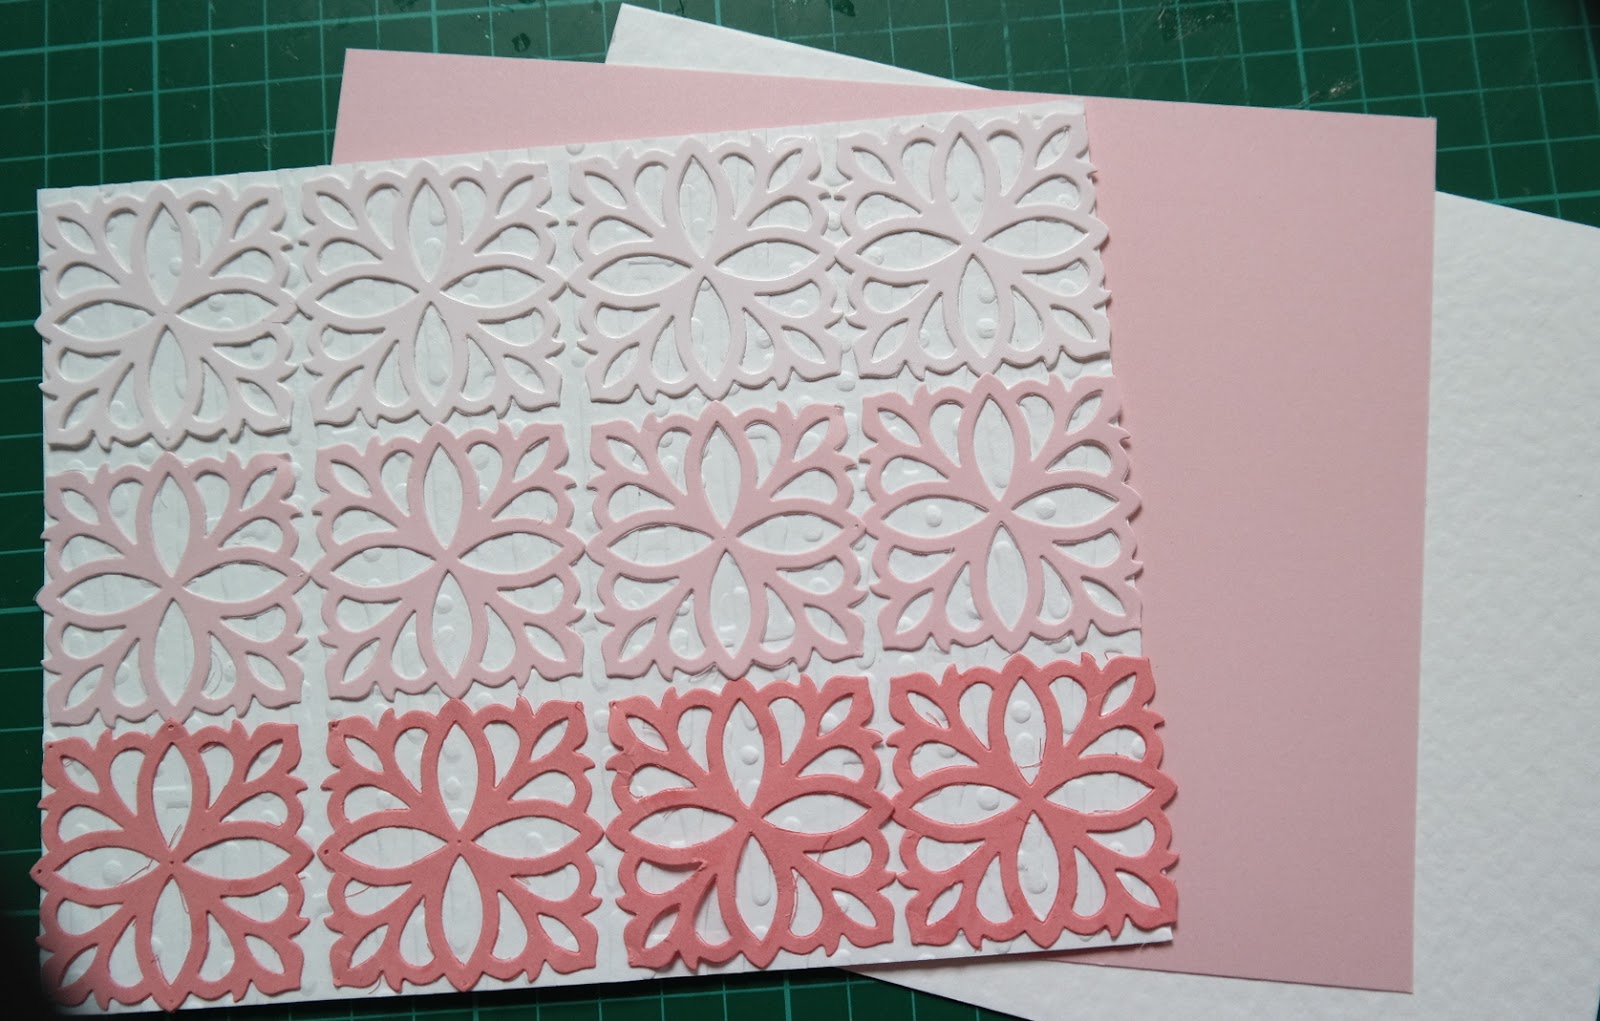
I have chosen white card for my base and three shades of pink to create the Ombre effect.
Fold one piece of  white card in half along the long side and keep the fold at the top
From Damask Motifs take the square one (die # 5) and cut  and emboss four of each shade of pink 
Arrange these on to a panel of white card so that they fit four of one shade along the top and continue until the card has them all with the four darkest at the bottom. Trim if needed.
Layer this onto a slightly bigger piece of pink card and then add to the white base card and trim this so that this is slightly bigger again. Leave small borders around each edge.
With the darker pink and the largest die (#7) in  Damask Motifs  cut three shapes. 
Stamp and heat emboss your sentiment and cut it out with the tag shape from  Damask Accents.
Cut as many leaf shapes from the same set as you will  need. I have double layered my leaves to give them extra strength
With the large petal shapes I have pinched them at the bottom and added some glue and then glued three of them together as shown in the photo.
Arrange them on the back ground panel in a position that pleases you and glue in place
Add flowers to the centre petal and ribbon bow at the bottom. Dress the flowers with leaves
With double sided foam tape place the sentiment tag under the bow and add more flowers
I have added in a hat pin to the display for extra effect


 Now it's time to go through your dies and see just what you have and maybe it's also time to brush them off and make them work again.

More tomorrow ...

Hugs xx

April 04, 2016

Labels 20 on YouTube

Hi Everybody,

Another video out on YouTube for you today is this one
and it is using an older die from Spellbinders.

Labels Twenty is one of my all time favorites as it mixes will with lots of other shapes ...but sadly is now retired from Spellbinders website.

The Diamante "Bling" that matches this set is from Want2Scrap  They also sell this shape in Nestaboard which is a thicker alternative to the die cut to use on your designs

The other dies used in the making of this card are the Grate Effect   inside the frame and also the intricate  Mystical Embrace for the background

The little Architectural Accents have been multi cut and glued together for strength and then added in specific places to enhance the flowers.  The Leaves are from the older Foliage set. 

You could find these retired dies on Ebay or Amazon and you may need to search for them,  but I am using them because I have these older dies in my "stash"  and I don't want to waste my purchase 

My flowers are as always from Wild Orchid Crafts  and I have sparkled them with Gesso and Glitter 

More tomorrow ...

Hugs xx


April 03, 2016

Cherish ...

Hi Everybody,

All the flowers and the dark green leaves on todays card are from Wild Orchid Crafts

I have added in a little resin Angel  (also from WOC)  just under the sentiment.

The flowers are in pretty shades of pink and of course they have been sparkled with Glitter.

But I achieved the delicate shade of pink by brushing on some pink Acrylic paint lightly on to the white flowers and leaving it to dry


At the bottom section I have used some Punchinella ... the sequin waste that can be bought in rolls  ... and I hot glued it in place under some torn paper

I cut ivy leaves and added them around the flowers and then tucked in some silver metal leaves to the display.

The dies used are 5x7  Matting Basics    to create my base card and then Classic Ovals has been used to cut a piece of card that has embossing paste pattern on it.

This is layered with the Scalloped Oval and then added to the card

More tomorrow ...

Hugs xx


April 02, 2016

Card Winner today ...

Hi Everybody,

So here we are with another Saturday and this afternoon Griff and I are going to see one of our Granddaughters at the Lowther Pavillion.  She is "Annie" in the musical of that name and we are going to the matinee to watch her perform.

But first things first and that is the draw for the winner of the Black and White card. A name has been pulled from the hat and it is you ...

Linda Batson 

would you email me please 
christina@card-making-magic.com
with your postal address and the card will be on its way to you.

Please let me know when you get it and I hope you will like it.

The winners names are all posted in the  Winners Page  each week so that you can check the list. Click the link to go to that page, and it will always be in the side bar to your left for you to check any time 

More tomorrow ...

Hugs xx


April 01, 2016

Friday Freebie 112

Hi Everybody,

This striking black and white card is on offer as todays Freebie and would really suit a teenage girl with it's modern style

It is the card that was featured in the video tutorial for Black and White Cards  and you can see it being made if you click the link.

If you would like to own this card  (plus one more in the pack)  then all you need to do is leave me a comment at the bottom of the post.

Under my signature you will see "Comments" and all you need to do is click that link and it will open another window for you to add yours   From those comments a name will be chosen at random and the winners announced in tomorrows blog post.

I will also add it to the Winners Page   and that is always in the side bar to the left so that you can go back and check the names listed.  You will then have 72 hours in which to email me your postal address and the card will be yours.

More tomorrow ...

Hugs xx