This is the second visit to Parisian Accents and Motifs as this is such a pretty dies set and can be used in lots of ways.
The first one was added on the 26th April with Parisian Accents and Motifs
If you don't have this particular set then you can try this idea with any of the ones you do have and get a really good result.

Spellbinders Supplies:
- S5-034 Parisian Accents( Retired)
- S5-035 Parisian Motifs (Retired)
- S4-114 Standard Circles
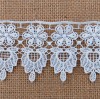
- SES-005 Curtain Beads Folder
Other Supplies:
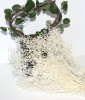
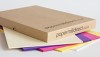
- White Card from Papermill Direct
- Kraft Card from AnnaMarie Designs
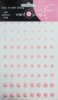
- Creme Pearls from Want2Scrap
- Gold Embossing Powder
Instructions:

With an A4 piece of Kraft card score and fold it in half and with the fold at the top trim the card down to 4 1/4 x 8 1/2" to create a long base

Cut a white mat that is slightly smaller than the base card and emboss this panel then add it flat to the base card

Cut the large shape from the Motifs
Cut two of the border strips and the largest die from the Accents all in Kraft Card

Stamp and heat emboss the sentiment of your choice onto some white card and trim to a banner shape on one end.

Arrange the border strips around the banner and glue in place.
Cut the shape from the Accents set into two pieces and arrange one of them at the end of the banner shape as shown in the photo
Add foam tape to the back of this assembled piece

With foam pads add the largest shape to the left of the card front and cut a size of circle that will sit in the middle in white
Add your banner piece to the top adding more foam pads to the right side to balance the banner out.
Dot with pearls to match your design and a pearl flourish for an added touch
Don't forget to visit the Tuesday Tutorials Page barbecue ALL the videos are listed there for you to click any time you want
Don't forget to visit the Tuesday Tutorials Page barbecue ALL the videos are listed there for you to click any time you want
More tomorrow ...
Hugs xx