Beautiful Card Designs Made Easy

December 05, 2017

Tuesday Tutorial - Love & Marriage Card

Hi Everybody,

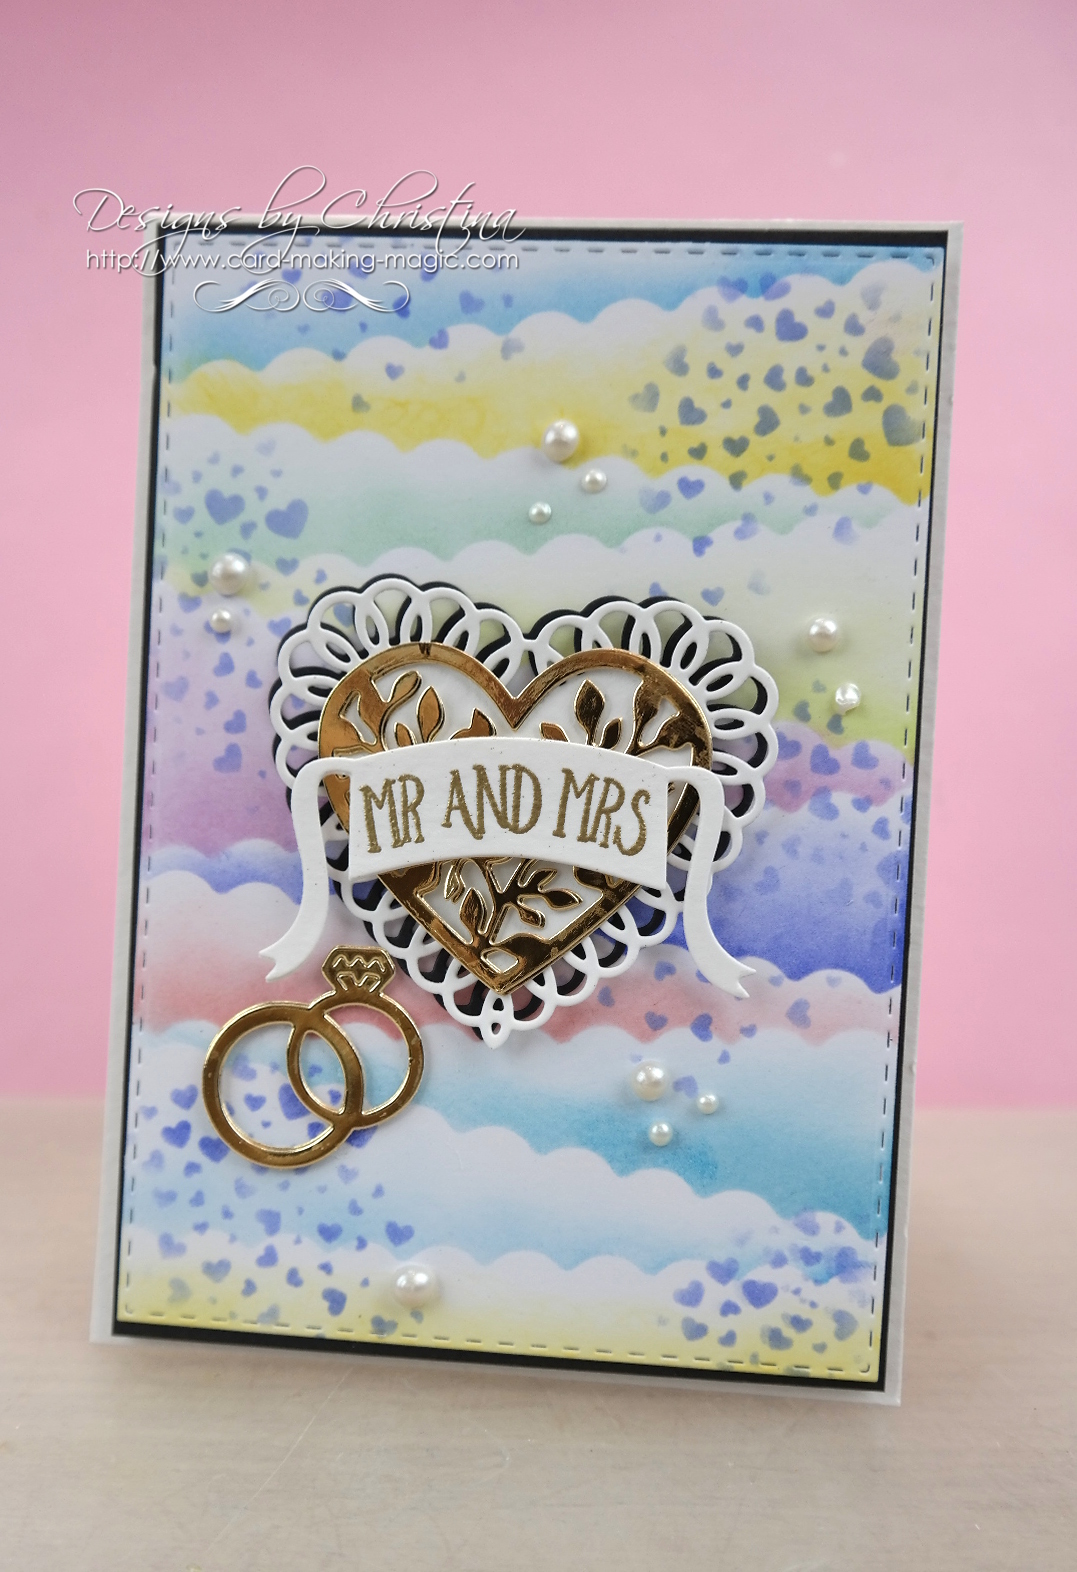
Today's card is really a simple wedding card that will fit into an envelope. I have used the Love and Marriage Additions set that is part of the "Christina Collection"  The dies are now back in stock and they are available only from Craft Stash
Supplies Used:

  • Complete Card & Box Die Set
  • Love & Marriage Additions
  • Silver Card from Craft Stash
  • White Card from Papermill Direct
  • Silver Organza Ribbon from Mei Flower
  • Silver and White Wedding Day Ribbon from Deco Fun Bow Maker
  • Silver Twine from my stash
  • Cosmic Shimmer Dries Clear Glue from Craft Stash
  • Foam tape from Craft Stash


  • Instructions:

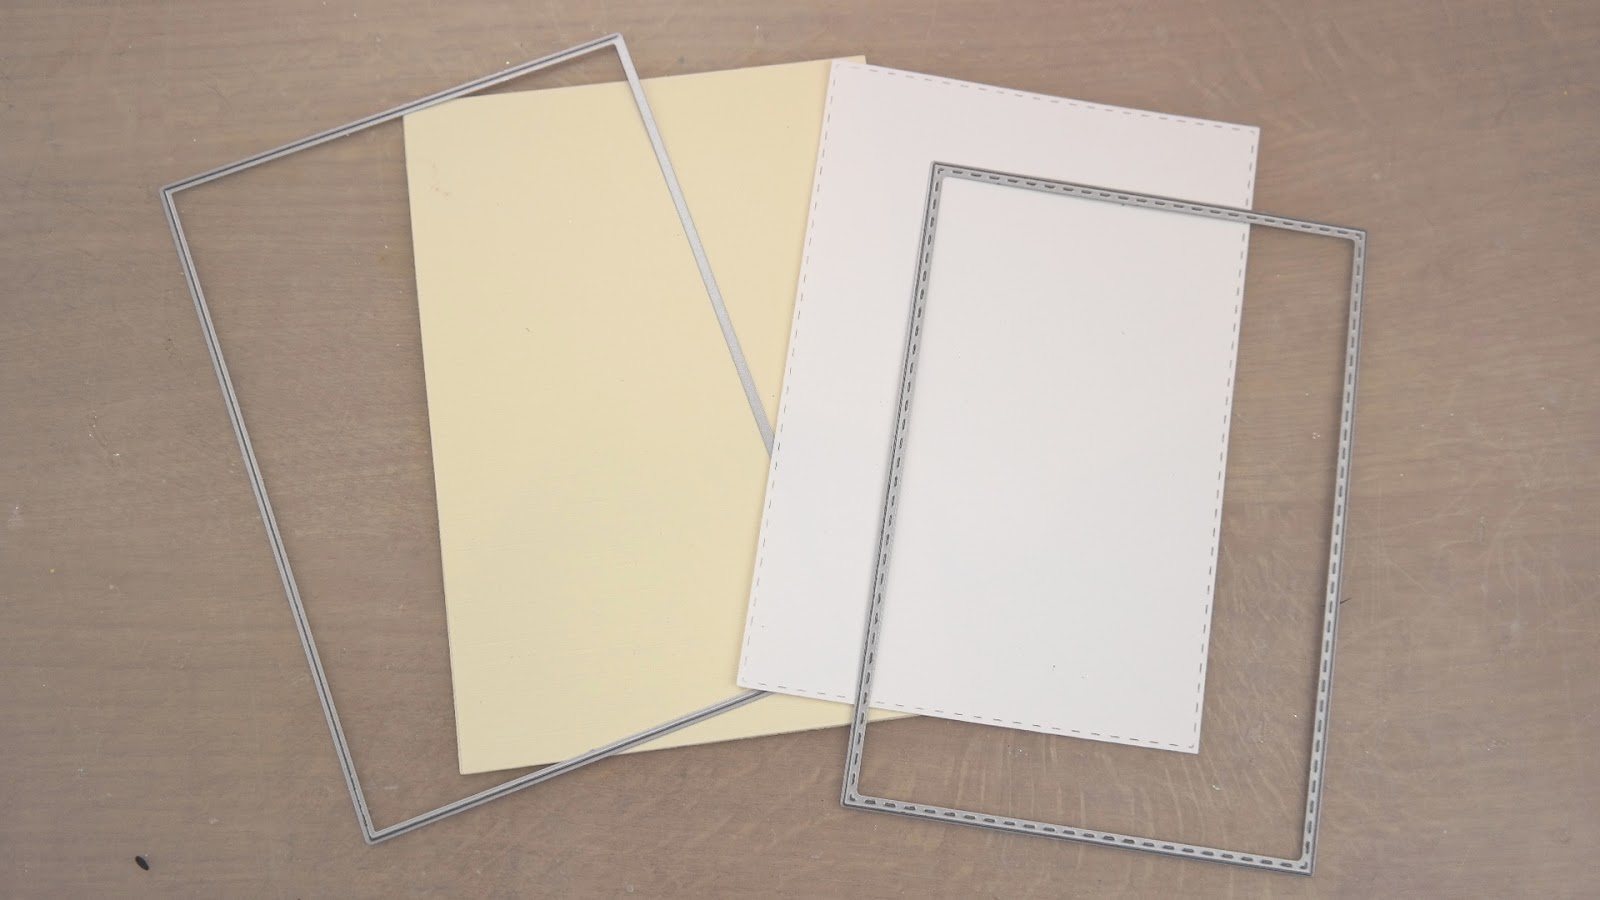
    With  white card and the card element to the die set create your Tent Fold Base card 
    Cut another layer with the Stitched Mat die
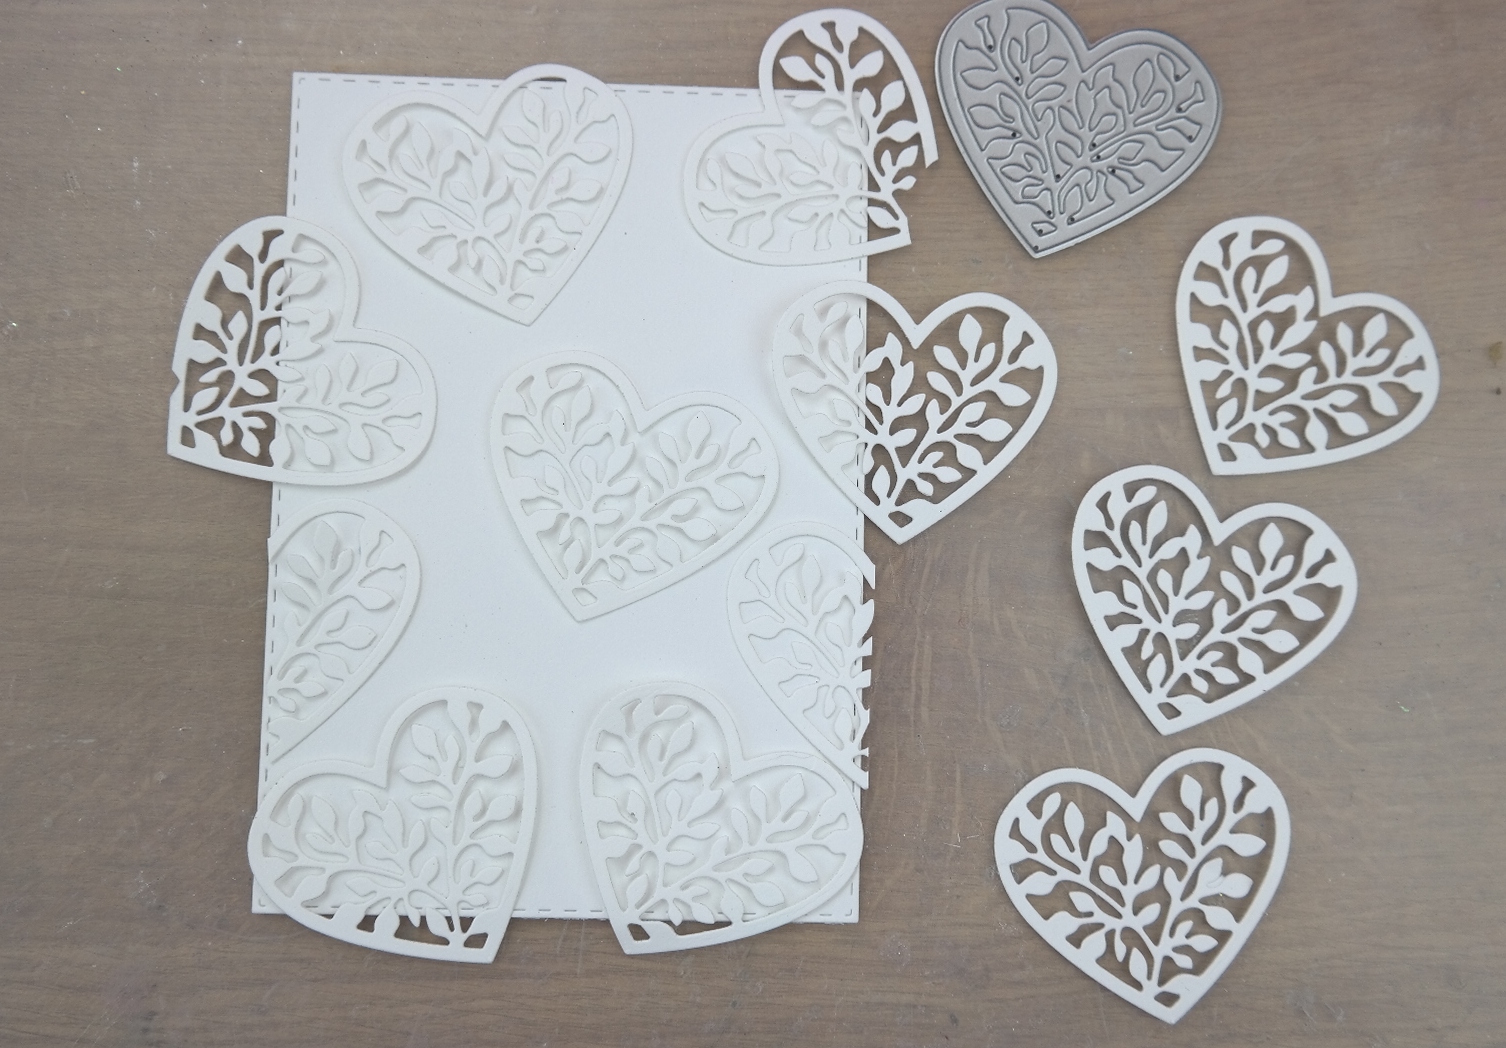
    From the Filigree Heart in the Love & Marriage set cut as many hearts as you will need to add to the stitched mat.  Glue in place allowing some of them to overhang and trim as needed
    From some Bright Silver card cut a layer that will sit between the base and the stitched mat.
    From the centre of this card cut the larger heart band the Mr & Mrs
    You can also cut the Lock and Key from this piece. Keep the tiny hearts that come from the key and add these to the card front
    Add the white heart panel to the top and once it is layered up no one will know that there is a hole in the card 
    Double wrap these layer with silver organza ribbon and the Wedding Day Ribbon
    Add foam tape to the back and add these to the base card
    Tie a bow with the two ribbons and add the Lock and Key to some silver twine and place in the centre of the knot. 

    And there you have a really pretty card to send to someone on their special day
    Change the colours to suit the wedding day theme. Personalise it with their names or the date of the wedding. The possibilities are endless

    More tomorrow ...

    Hugs xx

    December 04, 2017

    Baby Occasions - Baby Boy card

    Hi Everybody,

    The other day I  showed you a baby card for little girls and today it is the turn of the boys

    I used the Baby Occasions Additions from the "Christina Collection" and that is available only from Craft Stash

    So this card is created using the stamped elephant for the background and I used Blue Print Sketch.

    It looks like a really dark ink but it dries a lot softer than you think and it matched the blue card much better than any other shade


    But today I have a special treat for you and that is to share not only my own video but also that of my lovely young friend Christine Smith from Crafti Potential
    She makes the most amazing cards and this be is no exception.
     I am delighted with what she has done using the stencil from my Baby Occasions


    More tomorrow ...

    Hugs xx

    December 03, 2017

    Saturated Canary & Copics

    Hi Everybody,

    The other day when it was cold and wet I had an afternoon colouring and this beautiful image was my choice to use.

    She is called Cinderella and she is from

    This was a digital image and it is one that I bought some time ago. 

    But they have many images now on rubber stamps and at reasonable prices

    I have coloured her before but this time I have used the new Copics that I have just bought as a Christmas gift from ME to ME

    There are mistakes in it but as I practise with the Copics I will improve and I really enjoyed the process of colouring her in.

    I love the images from Saturated Canary as they have big eyes and lots of beautiful hair and are such a pleasure to colour.

    More tomorrow ...

    Hugs xx

    December 02, 2017

    Card Winner ...

    Hi Everybody,

    Here we are with the weekend again and not many to go now to Christmas,  When I got up this morning there was a box behind the front door and it wasn't until I opened it that it dawned on me 
    Today is my Wedding Anniversary and the card was from Griff.  

    I completely forgot about it, so I sneaked up to my craft room to make one. 

    But I haven't forgotten the draw for the card and gift from yesterday and the name today is...

    Marjorie Bates
    could you email me please with your postal address to
    christina@card-making-magic.com
    and they will be in the post to you straight away.

    I am happy to tell you that the "Christina Collection" of dies, stamps and stencils is now back in stock with Craft Stash

    More tomorrow ...

    Hugs xx

    December 01, 2017

    Friday Freebie Card & Gift - Cottage Garden

    Hi Everybody,

    The lovely gift this week is from 
    and this is one of the cards from the video.

    It is a really useful corner die that can add a pretty finishing touch to your designs.

    So if this is a gift that you would like than all you need to do is leave me a comment at the end of the post.

    Then Please Please Please come back tomorrow to check if it is your name listed as  the winner because I have no way to chase you up if you don't.If the gift is not claimed in 72 hours then it will be offered again at a later date to some one else.

    More tomorrow ...

    Hugs xx


    November 30, 2017

    Baby Occasions - Baby Girl Card

    Hi Everybody,

    Baby Cards are always lovely to make and they are something I really enjoy doing especially with flowers, ribbons and pearls on them.

    But I have been very restrained with this one and kept it  soft and un-fussy ... well it is for me anyway.

    I have used the new additions to my "Christina Collection" and this is the Baby Occasions set of dies, stamps and stencils

    The video is not long but I hope you enjoy it all the same Baby Occasions  - Baby Girl Card

    With hindsight I wish I had done the baby shoes from the stencil a little deeper in shade and maybe added a few more along the panel.

    But once I came to that conclusion it was too late as the card was nearly finished.  Still I will know better next time ... live and learn !!

    More tomorrow ...

    Hugs xx

    November 29, 2017

    Another lovely freebie ...

    Hi Everybody,

    The free gift with Simply Cards & Papercraft 171 is this die and stamp set duo and there is quite a lot that you can do with it.

    In the video I have tried to show you some easy ways in which to use both.

     I hope you will enjoy

    There are more ideas on how to use the gift inside the pages as well as other card designs you may like to try

    So it's time for a break and cuppa especially if you have your own copy of the mag.

     I know you are going to enjoy reading this months.

    More tomorrow ...

    Hugs xx

    November 28, 2017

    Tuesday Tutorial - Quatrefoil Trellis - Card Making Magic

    Hi Everybody,

    The Tuesday Tutorial is changing from this week and instead of other companies dies I am going to be featuring my own collection from Card Making Magic
    This whole set of dies, stamps and stencils are available only from Craft Stash and each week I will be using a different piece to show you just how versatile it is.
    More will be added to the collection in the coming months and the links to the products I have used will be at the bottom of the post 
    Supplies:
    • Complete Card & Box Die Set
    • Quatrefoil Trellis
    • Cream & White Card
    • Guipure Lace
    • Pearl clusters
    • Altenew Inks
    • Finger daubers
    • Cosmic Shimmer Dries Clear Glue
    • Foam Sheets
    Instructions: 
    With the card making element from the Card & Box Die Set create a tent fold card base in cream
    Cut another in white with the Stitched Mat
    With the outer part to the Trellis die cut a layer in cream and then with the two dies cut the patterned piece in cream and glue these two layers together
    Wrap with the lace and glue it on the back so that the edges cannot be seen
    Arrange the foam tape to avoid the lace and creating more bulk 
    From the flowers and leaves in the Card & Box Die Set cut as many as you would like
    Cut extra if you intend to decorate the box in the same way
    Cut several Happy Birthday sentiment and stack them together for strength  
    Add these to the Banner die cut
    Ink and shape the flowers and leaves with a ball tool and inks of your choice
    Stack them with as many layers as you prefer to create as many flowers as you need
    Arrange the flowers and leaves as pleases you and glue the pearl clusters to the centre of each flower
    Add the sentiment banner to the top of the lace with foam pads and a little extra glue to hold it securely.

    More tomorrow ...

    Hugs xx

    November 27, 2017

    Love and Marriage Additions

    Hi Everybody,

    A really easy card today using the beautiful Love & Marriage Additions to the Christina Collection

    I used the border stencil to create the coloured panels in the card and an assortment of Distress Inks

    To get the blending add a little more ink as you come onto the card and then fade out to lighter strokes as you more away from the stencil.

      I used bright gold card for the heart and wedding rings and accented the panel with black

    The second card was done a little more heavy handed and with some of the deeper colours but still the same technique

    I add more pearls to the second one and I tried to use the same shade pearl drops as the colour they sat on

    The video will show you how I got the look and it is just long enough for a cuppa and a biscuit


    Both of the cards are relatively flat and so will fit nicely into a standard sized envelope for posting


    It is a really effective look and I was quite happy with the result.

    More tomorrow ...

    Hugs xx

    November 26, 2017

    Ruby Card & Tonic Craft Kit 02

    Hi Everybody,

    Craft Stash have a special deal on their website for the Christina Collection and the Gemini Junior Machine together and so today I have made this card using that die cutter.

    I have also used the beautiful cad and papers that came in the Tonic Craft Kit and these are lovely vibrant reds and golds 

    So what could be better than a Ruby Wedding Anniversary Card to celebrate forty years of being married. 

    The video will show you how I made this card and the box ... Ruby Card with Gemini and Tonic   and you may have to improvise with your card if you don't have the Tonic ones that I used.

    I was really pleased with this one once it was finished and the flowers are from Wild Orchid Crafts and are quite deep.

    But once again it looks much better in the hand than the photo shows
    To get your craft kit visit Tonic ...
    UK & Europe 
    US & North America 

    More tomorrow ...

    Hugs xx

    November 25, 2017

    Today's Winner ...

    Hi Everybody,

    This is gong to be a cold day by all accounts and the weather forecast says to keep warm.
     And as it is Formula One weekend and Griff will be glued to the TV it looks like I will have to do some crafting to occupy my time ... so no hardship there then !!

    The draw for the card and gift has been done and the winner this week is you 
    Christi 
    so if you could pop your postal address in an email to me 
    christina@card-making-magic.com
    they will be on their way to you straight away.

    You have 72 hours to claim the gift and if you could let me know that you have received it safely please that would be great.

    Look out for another give away next Friday.

    More tomorrow ...

    Hugs xx

    November 24, 2017

    Friday Freebie Card & Gift - Floral Wishes

    Hi Everybody,

    Another free gift and card on offer this week and this is the gift free with Papercraft Essentials.

    It comprise of a die to cut out the centre of the wreath, an embossing folder for extra texture to your cards and a lovely stamp set

    The card that I am sending with the gift has used the little bow stamp to create a background and is the one created in the video 

    If this is a gift that you would like then simply leave me a comment at the end of the post and then come back tomorrow to see if you are the winner.

    You will have 72 hours in which to claim the gift 

    More tomorrow ...

    Hugs xx

    November 23, 2017

    A Video Collaboration ...

    Hi Everybody,

    Today's video is in collaboration with Christine Smith from Crafti Potential and we both used the same Christina Collection to make a Pop Up Box.

    It amazes me how we can come up with totally different ideas using the  same items but we have a lot of fun in the process.

    So here for you to view are the two videos from myself and Christine bringing you our ideas with the Pop Up Box.

    Hope you enjoy both


    Christine has created her pop up box using a die and I have gone the long way round and given you the measurements. But both are fantastic creations and well worth the effort to make them.

    More tomorrow ...

    Hugs xx

    November 22, 2017

    Die Cutting Essentials 31 - Sparkling Snowflake

    Hi Everybody,

    Another Christmas card today and this one is using the gift that is free with Die Cutting Essentials 31

    This lovely snowflake will help you to create some really pretty designs.

    For the one pictured I have used Peacock Feathers Distress Oxides to colour the snowflake

    It is a Shaker card and I filled the centre with Turquoise Glitter from Tonic 

    The dazzler on the snowflake was the wrong colour so I altered it with Alcohol markers

    In the video I show you how to do some partial die cutting to create a different look to the front of your cards.


    I also used the die cut as a stencil to blend the background with the front and then I decided to colour the whole die cut and add it to the card

    So you see when you start to play things can develop along lines that you hadn't planned on and still give you a pleasing result at the end.


    Crafters have happy accidents ... they don't make mistakes !!

    More tomorrow ...

    Hugs xx

    November 21, 2017

    Tuesday Tutorial - Spellbinders Christmas

    Hi Everybody,

    It's not that far away now and so here is a Christmas Card to get me in the mood to make more. This one is using Spellbinders A2 sized dies but I have made the card bigger and I will show you how I did this as the layering progresses 
    Spellbinders Supplies:
    • A2 Matting Basics A
    • Water Lilies Deco Accents
    • Merry Christmas 
    • Mosaic Vine Leaves
    • Platinum Die Cutting Machine
    Other Supplies:
    • Flowers and Holly leaves from Wild orchid Crafts
    • Glitter from Glitter Magic
    • Card from Papermill Direct
    Instructions:
    With dies #6 and 8 from Matting Basics cut the larger die in gold and the smaller in some patterned paper (Die #1 is always the smallest)
    From the Water Lilies dies cut #3 in red and #2 in gold
    Layer the patterned piece onto the red layer and then both onto the gold card with foam pads between
    Layer these onto another piece of patterned paper and let these now determine the size of your card base ....
    ... by placing them onto the fold of an A4 piece of gold card and trimming to the size you want it.
    You can make your borders as wide as you like ... I kept mine quite narrow
    Cut the sentiment die out twice in red and gold and layer them together.
    See which way round you prefer them to be stacked  ... I decide on the red shadowed by the gold
    I added the words to my card front with a double layer of trimmed foam pads underneath to give a really deep effect and the picture shows you how it looks from the side
    Cut the vine and trim to the size that you require and add to the card front with Poinsettia flowers and Holly leaves  Dot the flowers with glue and sprinkle with glitter for a sparkly effect
    There is your pretty card all ready to send for someone to display on their mantle shelf 

    More tomorrow ...

    Hugs xx