Beautiful Card Designs Made Easy

January 26, 2016

Tuesday Tutorial - Small dies

Hi Everybody,

In the die sets that you have in your personal collections do you often come across the small ones and don't know what to do with them ? Maybe this is something that you could try with any of them. I have used different shapes on my cards to show you some of the ideas I came up with

Spellbinders Supplies:
Other Supplies:
Instructions:
Create a Hinged Card   for your base by cutting two white panels from die #9 Matting Basics A
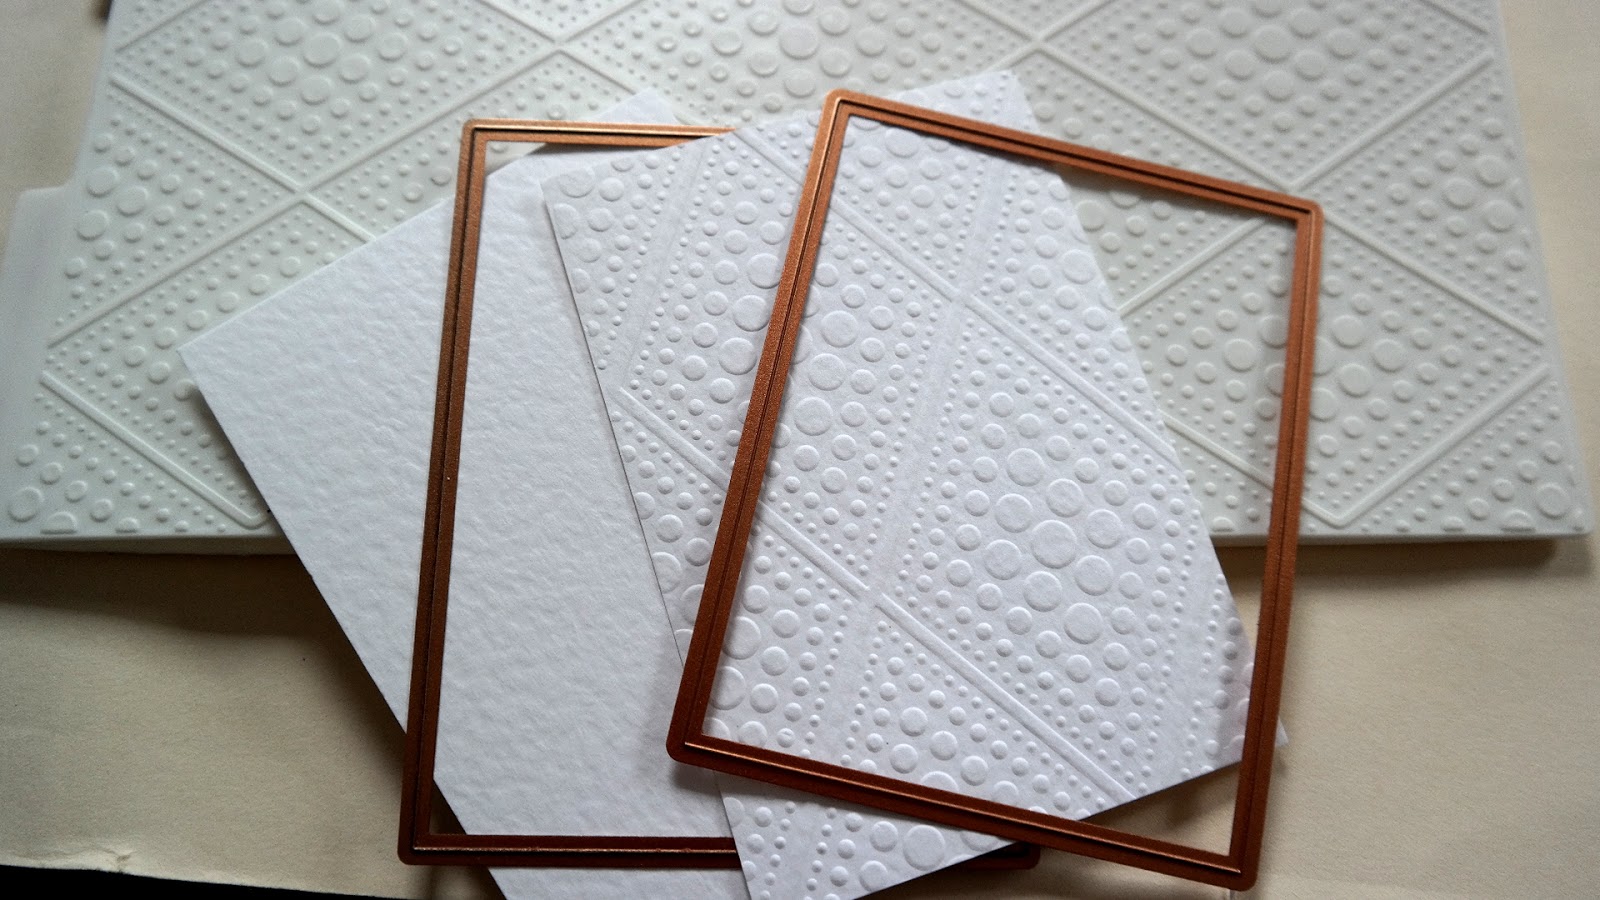
Cut another layer of white card from die #8 Matting Basics B and emboss to add texture and interest to the layer
(Please remember that #1 is always the smallest die)
Create some coloured card with the  Brusho Crystal Colours  by sprinkling the card with crystals from the pot and spritzing with water. Leave to dry.
You can use any other form of water colours or simply used some patterned and coloured card that you have in your "Stash"
From the smallest dies in the sets that you have cut as many of the shapes as you would like to add to your card front. I have used hearts, stars, diamonds and octagons  ... which I have had for a long time.
But you can use any that you have ... circles, squares, flower shapes etc. 

I have stamped the sentiments onto strips of white that will fit around the  embossed layer and then placed a thin strip of the coloured card long each side.
Add your chosen shapes in a pleasing display then add the whole lot to the base card with foam in between to raise the panels up and your done 

I added in some of the baked Ikea dots that I told you about last year

More tomorrow ...

Hugs xx


January 25, 2016

Birthday Cards (Video)

Hi Everybody,

It is just as easy to make several cards in one session,  and while you have all the equipment out and on hand then that  is the time to do it.

These cards are all made exactly the same way ... same card, same stamp, same embossing powder, same design, same size

The only thing that has changed is the colours and all these pretty colours are from Papemill Direct 


The stamp that I have used is  Patterned Triangle Background  and it is a large mounted stamp from My Favorite Things.


I have used Bright White  embossing powder from WOW and it is really white when heated.

The script stamp is one of the  Large Fancy Sentiments from JustRite Stampers.

The verse sentiment on the inside of the card is from Crafters Companion and is one of their Sentimentals Range 

The enamel dots are from Want2Scrap

An easy set to make and can be used throughout the year ... and they would be suitable for male cards too

More tomorrow ...

Hugs xx

January 23, 2016

Today's card winner ...

Hi Everybody,

A little late in the day to be adding this post ... but better late than never. The reason for my tardiness is that Saturday mornings are spent going to Sliming World group. My goal was to lose two stone for Christmas and I was two pounds short of that goal.

But no worries the week after I had lost another pound and last week I stayed the same. But today I have ..... Gained one pound and I am not a happy bunny. So double the effort this coming week and see how we do. I want to lose another stone before my birthday at the beginning of March, and I am determined to do it.

Anyway the draw has been done and the name chosen this week will win the card on offer. So the card will be on its way to you ...

 Joyce MacPherson
Would you email me please
christina@card-making-magic.com
with your postal address and the card will be on its way to you

I hope you will like it and that you will let me know when it arrives.

More tomorrow ...

Hugs xx

January 22, 2016

Friday Freebie 102

Hi Everybody,

Another card up for grabs today and this one is a really vibrant one.

This colour scheme is not to every bodies taste but it is a really pretty card once it is in the hand.

I have used  Bracket Borders Two   to create the top panel and layered it over an embossed piece.

Sadly this A4 Garden Lattice folder is now retired from Spellbinders but it is one I use a lot.

Now is this a card you would like to have???  Then you need to leave me a comment at the end of the post.

I have said it before but I will say it again ... please come back and check if it  is your name that shows up in Saturdays blog post as you only have 48 hours to claim it as yours.

Last weeks card has not been claimed  ... because the pages have not been checked by the winner ... and so it will be offered again at a later date to some one else.

More tomorrow ...

Hugs xx

January 21, 2016

True Friend Card

Hi Everybody,

Todays card is in a lovely shade of ginger and white and is one of those far prettier in real life than in a photo.

I have used the Tied Together die and this is a die that you will have to search for as it sells out very quickly whenever it is on sale.

It matches the Tied Together embossing folder and it is one  I use often.

The background has been raised up on foam pads and they are hidden beneath the verse label.

Each of the cross sections of the background has a tiny pearl from Want2Scrap  added

The finished card is 5x7 and has been made with the Matting Basics A and B 

The flowers are from Wild Orchid Crafts and into the display I have tucked one of my hat pins.

For a long time now the website that I buy my pins from has been out of action due to Gabby being ill but it is now back on the scene.

It is the Sparkles Group  and you will need to look in findings for hatpins.  They are in gold or silver colour and come complete with the end protectors and I love them.

More tomorrow ...

Hugs xx


January 20, 2016

Water Colour Wednesday - Make a Splash!

Hi Everybody,

This fun card uses elements that are my two favorite things to play with ... die cutting and water colouring,

Because I have been doing quite a lot of water colouring lately I thought I would show you a card each Wednesday

I have also been buying lots of stamps and matching die sets that produce the sweetest of cards very easily

The featured set here is from Clearly Besotted and it is called Make A Splash!.


There are four dolphins for you to colour and I have used the Gansai Tambi water colours for mine and cut them out with the dies

I used the colour smooshing technique  with Distress Inks onto some parchment and card,  to get the sea effect

I layered the panels up with foam pads to give the height.

This side view shows you how the layers are raised up from the card and I cut the wave effect with my border dies ... yet another way to use a border !!


I think this is a lovely card to give to a child and if you added in a birthday sentiment it would be spot on.

More tomorrow ...

Hugs xx


January 19, 2016

Tuesday Tutorial - Vines of Passion

Hi Everybody,

The title of todays tutorial sounds very intriguing but it simply refers to the heart die that I have used for the centre piece. It is very lacey and I think if makes a really lovely choice for the card just in time for Valentines Day.
Spellbinders Supplies:
Other Supplies:

With #7 from matting basics A cut two panels and create a hinged card
With #7 from matting basics B cut one panel in red
With #6 from matting basics A cut another white panel and dry emboss with any folder that you have 
(Please remember that die #1 is always the smallest)
From #3 of the Fleur de Elegance set cut one large shape in red
With Vines of Passion cut two base hearts in red and then cut both dies together and create two more shapes in white.
 Layer them together with small pieces of foam tape.
Layer the large shape onto the embossed white layer with foam tape, and then place this on top of the red panel. Wrap all these with red ribbon 
Add the two hearts in place on the front so that they overlap each other a little and hang just over the ribbon, and glue the single rose over the knot in the double tied bow
Stamp the sentiment onto a length of parchment that is wide enough to wrap around the layers and heat emboss in silver.
Fold the parchment around the layers so that the sentiment is where you want it to be.
Glue in place so that the all the workings are hidden at the back. 
Add all this to the base card
In opposite corners of the parchment strip place the metal corners and they will tie in the silver embossed word

More tomorrow ...

Hugs xx


January 18, 2016

Majestic Labels Eight (Video)

Hi Everybody,

This  pretty blue card is one  that uses all the dies from  Labels Eight   from Spellbinders. Once again these are older dies but some that I enjoy working with.

They can all be worked together to give some really lovely cards.

There is a video to show other ways that you can use this die too and I hope you will enjoy it.


I did this tutorial a while ago but I can't remember if I ever add it to a blog post and the white and silver card was last weeks Friday Freebie.

If I did  show it my apologies for showing it once more ... and if I didn't then here it is and you will find I have also added it to the Video Tutorials section at the top of the page ... in case you need it for future reference.

The spotty blue ribbon is added to the bottom of the card but if you fancy the idea of something really special then please take a look John Taylors new website and have some  Personalised Ribbon  made especially for you

More tomorrow ...

Hugs xx


January 17, 2016

Card Winner Today ...

Hi Everybody,

Thanks to all of you who took part in yesterdays Blog Hop I hoped you enjoyed your little trip around the world.  But now it's back to the Uk and today we actually had some white stuff and it is very cold.

We have done the draw for the white and silver card and the name pulled from the hat was yours ...

Ann Morris
would you email me your postal address please to 
christina@card-making-magic.com
and I will pop it in the post for you first thing in the morning.

Enjoy the rest of your day everybody and stay warm

More tomorrow ...

Hugs xx

January 16, 2016

International Ambassadors Informal Blog Hop

Hi Everybody,

Once a month some of the International Ambassadors have a blog hop and for this month we have chosen our favorite season as our theme.

If you are a regular follower of my blog then you will know that I love to make cards that are summery and full of flowers, ribbon and pearls and so this is the perfect theme for me.

I have also chosen to use my favorite dies for the card and the Victorian Collection was one that I really fell in love with when it was launched..

The beautiful flowers are from Wild Orchid Crafts and I love the arrangement for my summer display.

The blog hop is the way for you to get to know our individual styles and we would love it if you would visit each of us and leave us your comments.

The others are ...

Christine Emberson  - UK 
Linda Lucas  - Australia
Yvonne van de Grijp - Netherlands
Christina Griffiths - that's me

Thank you for visiting and for all your support. I hope you enjoy the hop

Tomorrow I will announce the winner of the Friday Freebie so please pop back then to see if it is you

More tomorrow ...

Hugs xx


January 15, 2016

Friday Freebie 101

Hi Everybody,

Todays card is in white with a touch of silver and that beautiful fabric rose.

It is a 5x7 card and could be for any occasion that deserves a celebration.

If you would like to win this card then all you need to do is leave me a comment at the end of the post .

Then pop back in the morning to see if yours is the name chosen as the winner

I am happy to send the card to anywhere that you live  and I would appreciate it if you would let me know when it arrives with you.

So add your comment and keep your finger crossed.... but if you don't win this one there will be another card on offer next week.

More tomorrow ...

Hugs xx

January 14, 2016

Butterfly Frame

Hi Everybody,

Todays card is one that is featured on Craft Stash  and is from their Apple Blossom collection.

For this one I have used the Butterfly  Frame  but I kept the loose pieces in the die with some tape.

I cut it twice and layered it up and then added the butterflies as extras to the frame

More have been dotted around on the flowers and I added pearls along the body line of each one.

The flowers are from Wild Orchid Crafts and into the centre of the largest flower I have added a tiny  Glitter Ball  also from WOC

The card is a 5x7 and the base is made with card from Papermill Direct

The patterned paper is from Anna Griffin and is some that I brought back from Phoenix with me in 2014

More tomorrow ...

Hugs xx


January 13, 2016

Love those Birds !!

Hi Everybody,

These cards have all been made with the  Bird Crazy stamp from Tim Holtz and I have had so much fun with them.

They are not gender specific and so you can turn them into male or female cards with the flick of your pen.

 I have added stripes and spots to some of mine to make them look different

I also bought the sets called  Crazy Things  which creates items that you can add to the birds like ties and hats, and  Crazy Talk  for sentiments to go with them.

I also bought the matching dies too.


 I water coloured mine with Gansai Tambi  water color paints

I used Glossy Accents on the balloons and eyes and left them to dry overnight.

The base cards are all the same design in different colours and  the birds die cut and added to the front

This fabulous stamp set is sure to keep you amused for months on end and I will certainly be playing with them again

You can ring the changes for so many occasions with these and you will never be bored once the imagination gets fired up.

More tomorrow ...

Hugs xx

January 12, 2016

Tuesday Tutorial A2 Basics

Hi Everybody,

For todays tutorial I have used nothing but the basic dies that you may already have in your crafting "Stash".   These are some of the dies that we buy and then push to one side for the fancier ones.

But they are so useful in that they can give you a beautiful base card with the embossed edges, and also lovely ovals, or other shapes,  to layer onto your base.
Spellbinders Supplies:
Other Supplies:

With the largest die from the rectangles in Matting Basics A cut two in white card and  Create a Hinged Card
With the largest die from the B set cut a patterned layer and then in between these two hand cut another layer in plain pink that leaves a small border around the patterned layer
From the stamp set choose the character that you wish to use and stamp and heat emboss it onto the card. Colour any way you prefer.
Choose the plain die that surrounds your character from the Classic Ovals and then from the plain pink card cut another layer from the Classic Scalloped dies to leave a small border around the coloured image.
Cut a larger Scalloped layer from the pink card and use another patterned card that matches the colours scheme with the plain oval.

The size you use will depend on which character you use and which words. And the positioning of them.  The blue card at the bottom of the page is set out differently to the pink one at the top
Layer them together with foam tape in between to give dimension to your card.
Here are the layers that I have and I can now add them together.
I have offset the character on my card and wrapped all the layers with lace and ribbon before adding them to the base.
I have added tiny pearls into the corners as a finishing touch.
This card has used the same die sets, card, ribbon, lace and pearls. I have chosen another stamp from the same set and created this card in blue.
I have used a white gel pen to add Polka Dots to each character

More tomorrow ...

Hugs xx


January 11, 2016

Lilac Dream....

Hi Everybody,

Lilac is a colour that I don't use that often but I was really pleased with how this card turned out.

It has been created with the 5x7 Matting Basics and this has been the start of all this type of cards that I have shown this week.

I have layered lilac and another piece of white card but before adding them in place I have separated the top white layer with the Bracket Borders One

You can do this with any border die that you have in your "Stash"

Once I have cut it I have trimmed it down to leave a channel along the lower edge and into this I have stamped and heat embossed the sentiment.

Organza ribbon from Mei Flower  has been wrapped around the lower panel and then added to the card with foam tape.

Each of the cross sections of the Tied Together Embossed panel has been dotted with pearls from Want2Scrap  and is the same look as in last Tuesday Tutorial.

This is a really popular embossing folder and it sells out every time it comes back into stock so you will have to Google for it if you want to purchase it.

The bows centre and the flowers are from Wild Orchid Crafts and they have been sparkled with Glitter Magic

More tomorrow ...

Hugs xx