Hi Everybody,
When Spellbinders introduced the concept of the Imperial Gold dies it was a completely new idea to the world of die cutting.
With these dies you had not only the ability to cut and emboss but now you could also deboss the design into the card for a really special look.
For this card I have used mirror card and placed a matching hatpin into the bow.
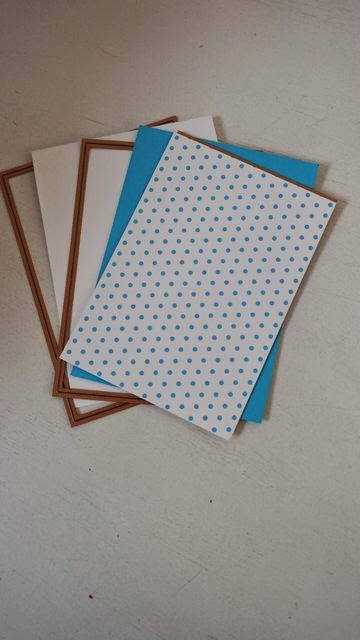
For the base cut two #7
5x7 Matting Basics A in white (#1 being the smallest)
In the color f your choice cut 1 #7
5x7 Matting Basics B and between this layer and the base card I hand cut another really thin edged layer in mirror card
In a patterned card cut one #6 5x7 Matting Basics A ... I used the spotty card
This video tutorial explains why I like to make my cards in this particular way ...
Create a Hinged Card
With
Gold Majesty Circles #6 cut and emboss the base layer from Mirror card
Then place the dies #4 #5 #6 together on your card and cut and emboss.
You can use a magnetic sheet to hold these dies in place as you need to make sure that they will not slip and cross each other or you will ruin the cutting edge
These three will create the frame shown and will give you a lovely deep impression in your card
Place foam pads on the wrong side of this frame and use the wider areas so that they wont be seen.
Add this frame to the mirror card base you cut previously
Layer up the mirror card, colored card and patterned card and use foam pads between the bottom layer and the base card.
Now before I add mine I wrapped ribbon around them so that it will be hidden inside the layers.
I added foam tape to the shaped layers and then added them to my base.
I inked the edges of a sentiment that has been cut into a plain circle and then added it to a Scalloped circle.
I used foam pads behind this and placed into the centre aperture onto the mirror card.
Then with a neatly tied bow with a Hatpin and some gemstones around the edge of the frame I think this is a really pretty card.
The large dazzler has been added to the knot and some flowers are my finishing touch,
More tomorrow ...
Hugs xx
 Hi Everybody,