Beautiful Card Designs Made Easy

July 27, 2016

Water Colour Wednesday - Back to School

Hi Everybody,

Todays image is from Mo's Digital Pencil and there is also a little girl and they are called Back To School 

I have used the curly haired version but you can get the same images with straight hair so it will fill a number of styles.

Colour these in the childs uniform colours and add their name to make it really special

I will be making one for my Great Grand-daughter Isabella who will be starting school this September

I have used Distress Inks to colour this and then fussy cut it from the card.

The shadow effect is created onto the background piece with  the bricks/

It is just a flat stencil also done with Distress Inks

The little banner is from a Spellbinders called Amused 1

More tomorrow ...

Hugs xx


July 26, 2016

Tuesday Tutorial - Framed Labels 46

Hi Everybody,

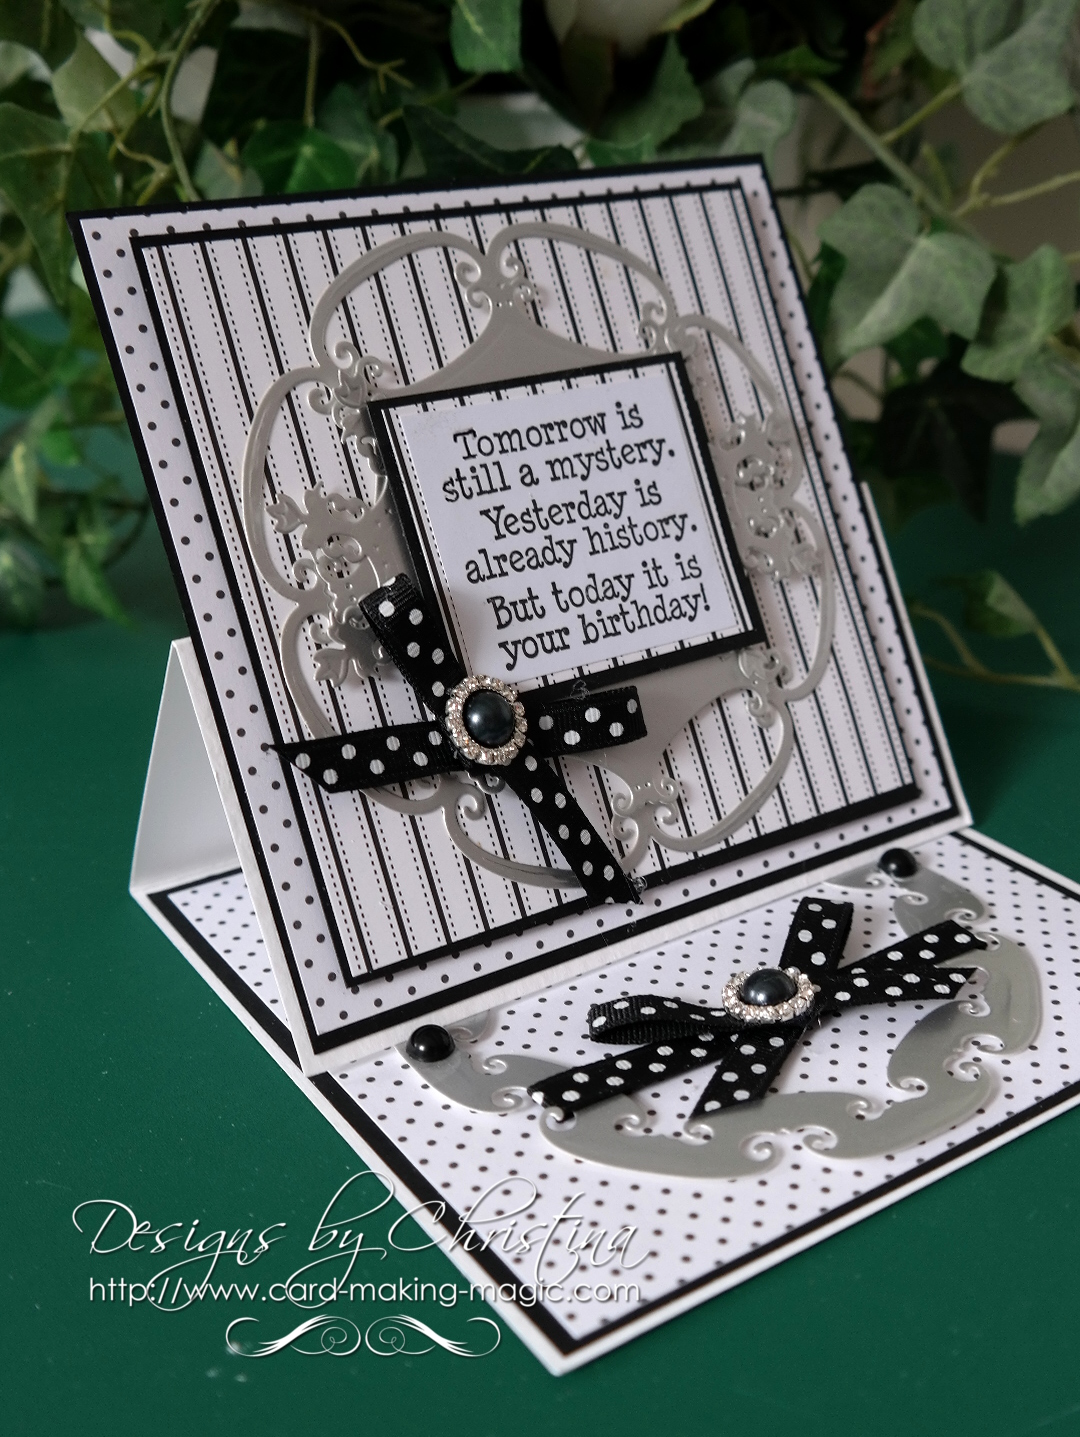
For todays card I have used Spellbinders Framed Labels 46 and I have created an Easel Card for my base and they are very easy to make
There are lots of tutorials on my website on all the variations of Easel Card  that you may like to try ... just click the link
The dies have several other sets that match them in the Labels 46 range
I have deliberately not mentioned sizes because you can make this any size that you want without any measuring at all as long as the die you choose to use will fit onto the panels
Spellbinders Supplies:
Other Supplies:
  • Pearl/Diamante centres from Wild Orchid Crafts
  • Black Spotty Ribbon from Mei Flower
  • Black Pearls from Want2Scrap
  • Black Spotty/Stripe card from AnnaMarie Designs
  • Verse from Crafters Companion
Instructions:
Take a piece of white card and fold in half along the short side then trim it into a square
On one side fold in half again and this will be the top of the easel
With black card create a slightly smaller mat for both the top and bottom cards
With coloured card make slightly smaller pieces and mat onto the black cards
Create another black mat that is a square to hold the largest piece of the die cut and mat with card in a different pattern
Glue the base pieces to the inside of the card
With the top panel, only add glue to the bottom part and add this to the front of the easel card so that the card can open.
 If you add glue all over it then the top part will not fold and create the easel ...  Not a good idea !!
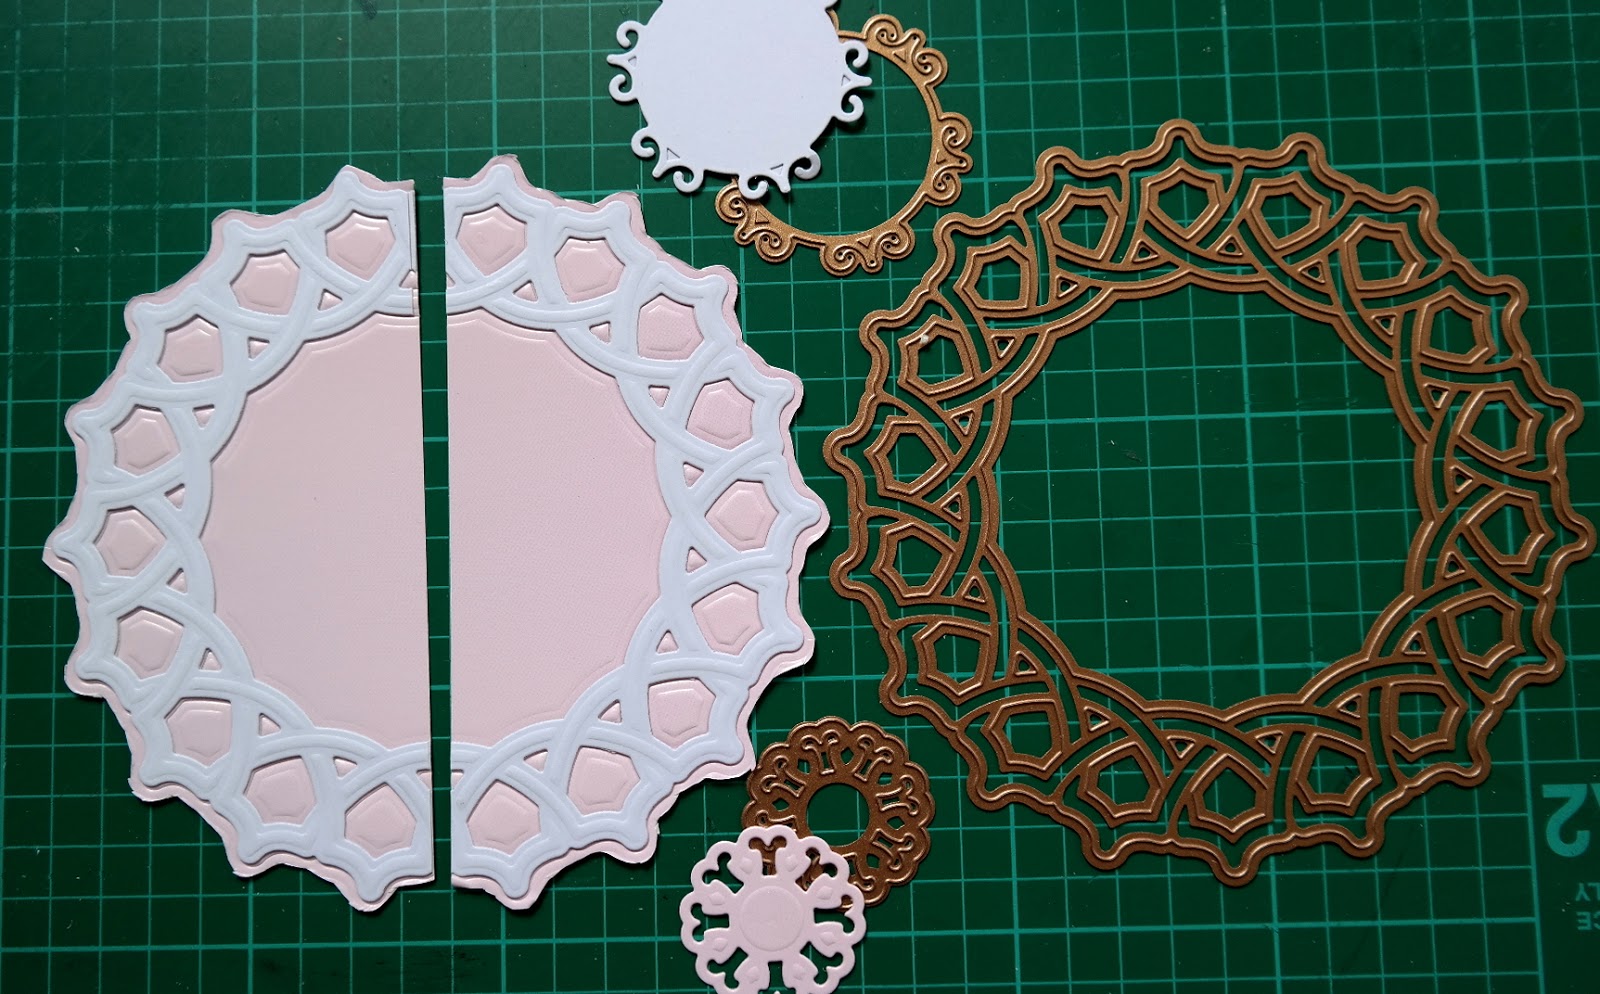
With dies #2/3 and 4 cut all the pieces in silver card and this will produce four pieces for you.
Starting with the smallest piece of silver card as #1 we will build the card
With silver piece #3 I have wrapped this with ribbon. 
Add foam pads to strategic spots on the back  and attach to the base card
Add the bow and the diamante centre 
Add two small black pearls to act as stops to hold the easel open 
For the front of the card add the silver piece #4 with glue around the edges
Add the #2 with foam pads to give dimension
Add to the top panel with foam tape and although the picture shows the tape at the bottom only you can add it all along to secure the panel in place

Stamp and emboss a verse of your choice and then mat and layer it onto the same type of card
Cut silver piece #1 in half and secure it behind your verse
Add foam pads behind and add to the front of the card
Add some matching ribbon to the front and glue another centrepiece in place
Prop the easel open with the black pearls 
There is space on the back or the inside where you can add your personal greeting

More tomorrow ...

Hugs xx

July 25, 2016

Ombre Effect and Die Cutting

Hi Everybody,

This neat card is featured in todays YouTube Video and it is called   Ombre Effect and Die Cutting  

It uses the Grate Effect die from Spellbinders and I have used the waste from the die to create my card front

I have used this idea before to create a really lovely card and showed you how to get two cards from the one die cut 

But this time I thought I would  do this in another way to get a different type of look and I really liked this card once it was completed

The sentiment is a bold statement on the card too and this is one I shall use time and time again. I cut it several times and layered them together for strength

The sequins just make it pop and they are a very popular embellishment at present. 

In the vidoe I have used other colours for the card too and as long as the colours blend together your cards will be fine. 

Don't worry if the ink looks blotchy because once it is cut out with the die no one will know as so little of it will show ... have fun

More tomorrow ...

Hugs xx

July 23, 2016

Todays Winner ...

Hi Everybody,

It's a beautiful day here today. Later on it will be playtime with Isabella, my Great Grand-daughter, and as it is so nice we will probably be outside in her playhouse.  I hope the weather is good where you are.

At the moment I have my eldest Grand-daughter, Ashleigh staying with me as she is here for a two week holiday from Australia and it is lovely to see here again for the first time in eleven months.
 Myself and my two daughters with my two granddaughters are all going out on Monday evening for a good old girly catch up over a pleasant meal and I am looking forward to that very much. 

The draw has been done from all the comments that have been left for me and a name has been chosen for some one to win the the card and die set from yesterday. The winner this week is you ...

Rita Edwards

would you email me with your postal addreressplease to
christina@card-making-magic.com
and they will be on their way to you straight  away

I hope you like the card and will enjoy the die set and please let me know when they arrive with you.

Day off tomorrow ...

Hugs xx

July 22, 2016

Friday Freebie - Card & Die 4

Hi Everybody,

So here are with another card and die offer that you can win

This card is a shaped design and there are lots of flowers along the edge

The die that is with it is called Day Dreams  and is a really useful little die to add to your collection

There is only one more week to go now of the card and die offer that has been running through July so you need to add your comment below if this is a combination that you would like to have

Don't forget to come back tomorrow and see if you have won

More tomorrow...

Hugs xx

July 21, 2016

Birthday Bears - My Favorite Things

Hi Everybody,

This delightful family of bears are from the stamp set from My Favorite Things called Birthday Bears.

It has a matching die set and I bought both of mine from Sevenhills Crafts

The cards are featured in my YouTube video
Birthday Bears 
It doesn't have to be just for birthdays and you can arrange your bears anyway you wish on your card.

But I thought it was fun to dress them up ready for the party.

All you need is a black fine liner pen that is suitable for water colours and draw in the outline of the clothes

Then colour in the area with your paints and leave to dry. Then you can add in spots, stripes, nappies on the baby bears, glasses, bows in fact anything that you want. You just need the confidence to add those marks in the first place.

Practise on spare card before and make sure that you are happy with the look before you add them to your card

Have fun !!

More tomorrow ...

Hugs xx


July 20, 2016

Water Colour Wednesday - Happy !!

Hi Everybody,

These water colour words have been stamped from the designs by Tammy Tutterow for Spellbinders

This one is called Big Dose of Happy and it is quite a large stamp.

All I have done is water coloured the words and then added Glossy Accents to them to make them shine but it doesn't show up very well in the photograph.

I wrapped the layers with lace and ribbon and added in the flowers to the bow.

The background is a trimmed Naples Medallion and on top of that I have added the Labels 56 both from the new Renaissance Collection by Spellbinders

All the links are added below for you to see the products

More tomorrow ...

Hugs xx


July 19, 2016

Tuesday Tutorial - Naples Medallion

Hi Everybody,

For this tutorial I am using the Naples Medallion and this is a large die set. 
You can make your base cards in this shape or just add it to a card but for this one I am taking my scissors to the shape and cutting it up.
The pictured card is 8x6"  because it is a baby card that will be signed by lots of workmates for their colleague 
Spellbinders Used:
Other Supplies:
Take one sheet of A4 card and fold in half along the short side, and keep the fold at the top to create the base card. 
With the pink card hand cut a panel that is slightly smaller then the base and leaves a small border around the edge
 Emboss this layer with any folder that you have
With the Naples Medallion cut the largest one in white and lay it onto some pink card and faux Nestie cut the pink layer that will sit underneath.  Cut this circle in half
Off set the two halves and add to your base card with foam pads to give some depth
Wrap the panel with ribbon to hide the join. I have used double ribbon for mine with white at the bottom and pink on top
Secure on the back and then add this panel to the base card
I decided to cut this chain circle from the Naples Medallion set and cut this in half and add to the cetnre circles. You can see this in the main photo  
I stamped a sentiment and used the Classic Circles to cut it out and then layered it onto the Scalloped Circle.
 I cut two of the smallest dies from the Naples Medallion and cut them both in half.
With some foam pads I added all four pieces to the back of my sentiment and added it to my card 
I dressed it with glittered flowers and added glitter balls to the centres
Notice the little pink butterfly nestled in with the flowers !!

More tomorrow ...

Hugs xx